
Gallery Wall Family Photos: Designer Ideas in Minutes
Key Takeaways
- Choose the right spot first, then select a layout that fits your space and story: grid, organic, ledge, or staircase;
- Keep things cohesive with either black and white or a shared color palette, and decide on matching frames or a mix of 2–3 finishes;
- Plan on the floor, keep 2–3 inches between pieces, and aim for eye level; Mixtiles let you stick, swap, and restick without damage;
- Curate candid moments and milestones, then refresh seasonally by adding or updating tiles for a living, personal photo wall.
Ready to turn your camera roll into a gallery wall family photos display you will love every day? This guide distills designer strategies like cohesive color, smart layouts, and simple planning into clear steps you can follow. We will cover the best places for a family photo wall, layout formulas that always work, and how to hang without holes. Mixtiles adhesive and magnet-backed tiles make testing, tweaking, and updating your wall simple and fun.
Ready to start? Turn your favorite memories into beautiful photo tiles. Upload your pictures, arrange them in our app, and get ready to stick and restick your story on the wall. No nails, no damage.
Where should your gallery wall of family photos go?
Pick a space you pass every day, then scale the arrangement to the wall so your photo display feels intentional and put together.
Entryway and hallways
Welcome guests with a linear row or tight grid that guides the eye down the hall. Narrow walls look great with smaller tiles in black frames or white frames for a crisp, cohesive look.
Living room accent wall
Anchor your family room with a statement grid above the sofa or a collected picture wall around the TV. Keep the center of the gallery roughly 57–60 inches from the floor for comfortable viewing in living rooms.
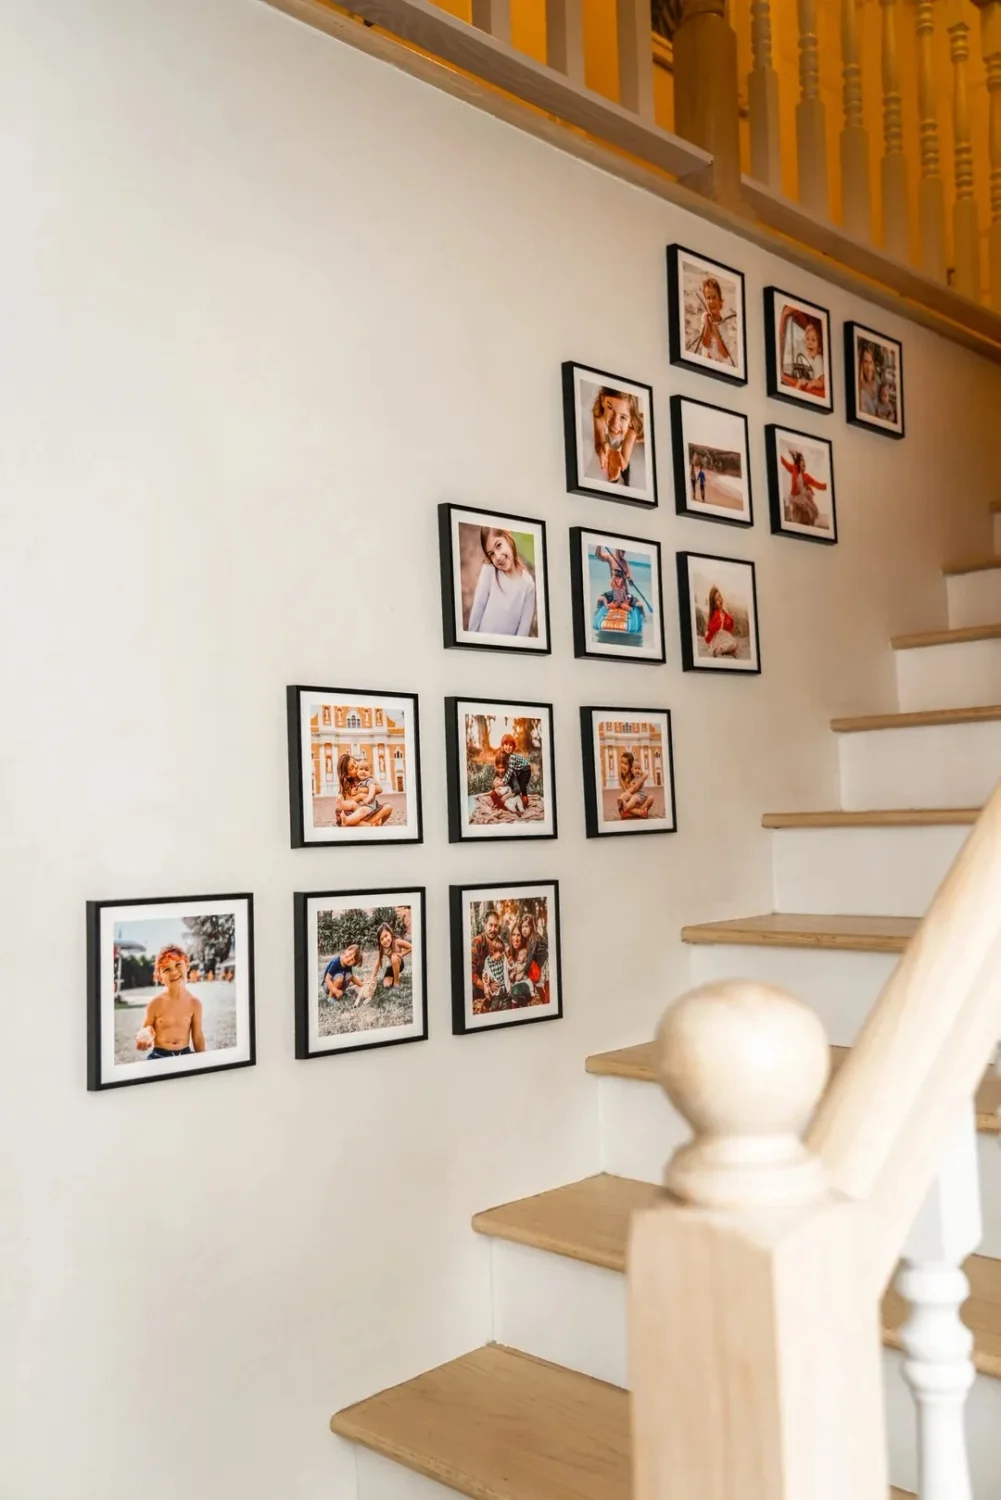
Staircase and landings
Follow the rise of the stairs with a sweep of frames. Start with one large family picture as an anchor, then add smaller photos around it for visual interest.
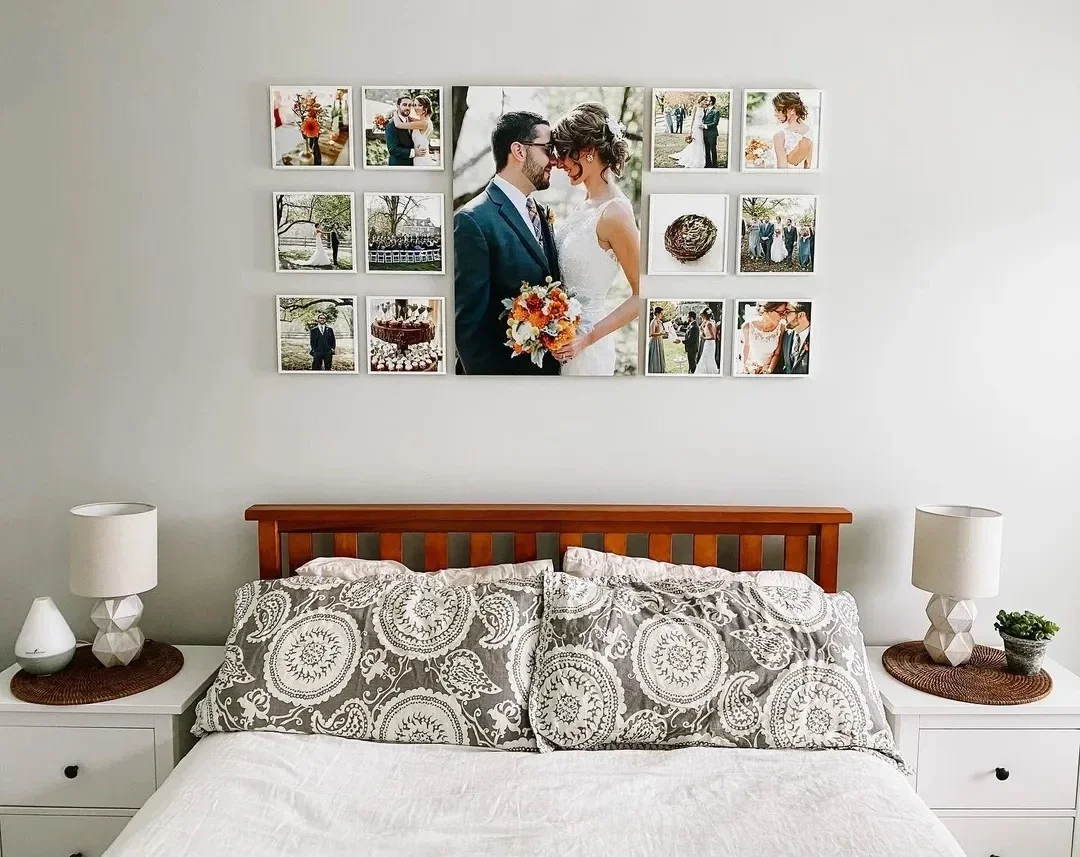
Home office, bedroom, and nursery
Create a calm photo wall around a desk or headboard using black and white images for a cohesive, restful feel. In a nursery, mix family photos with kids’ art for a unique, fun story. Aim to match frame color to finishes already in the room for easy harmony.
What layout works best for your gallery wall family photos?
Choose a layout that fits your wall shape and your style: clean grids feel modern, while organic layouts feel collected and artistic.
Clean grid (polished and timeless)

Perfect for modern decor and symmetrical walls. Use even spacing, same-size frames, and either all color or all black and white for a family photo wall that looks tailored.
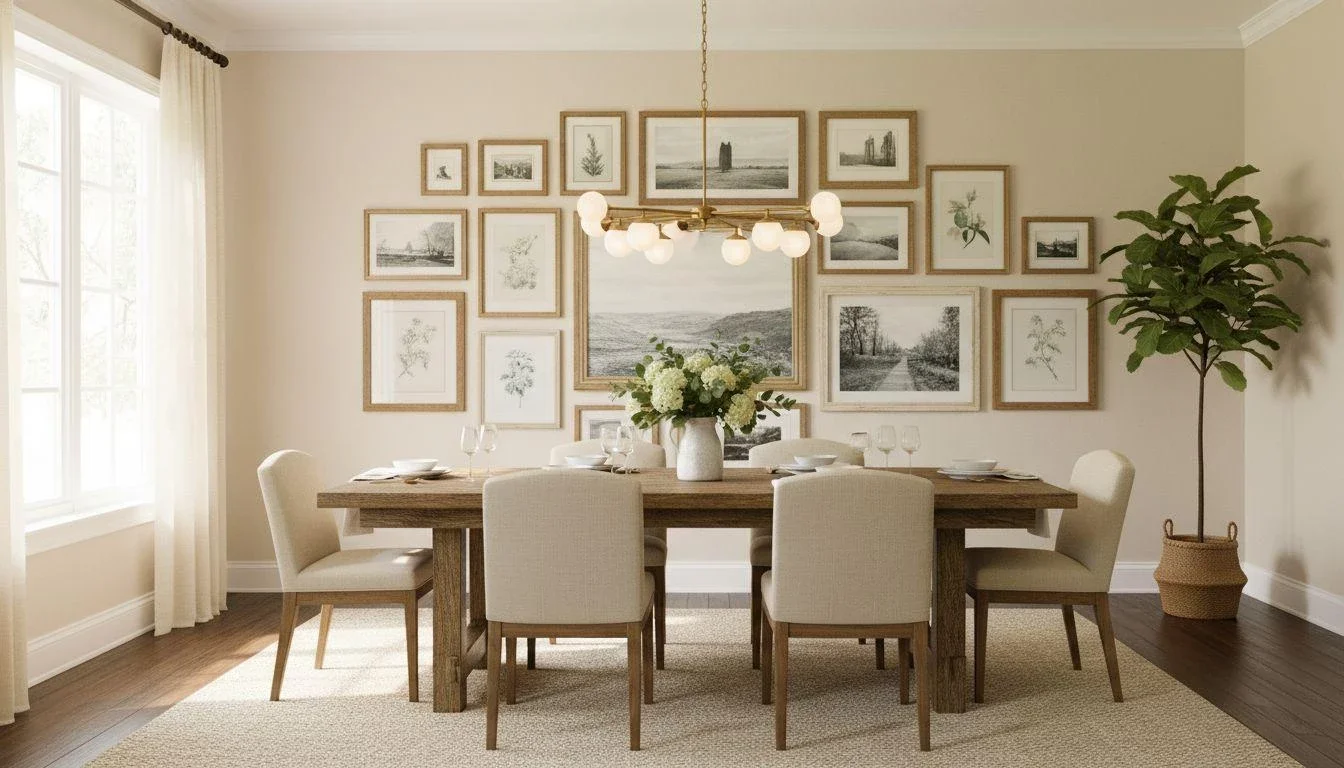
Classic organic gallery (curated and collected)

Mix sizes and orientations around one larger anchor. This picture wall style adds warmth to a dining room or living room and looks like it grew naturally over time.
Photo ledges and shelves (flexible and low-commitment)

Lean frames and swap pictures anytime. Combine family photos with small art pieces or books for depth and texture.
Staircase sweep (dynamic and story-driven)

Arrange images to rise with the stairs. Repeat frame colors to keep a cohesive rhythm as the gallery moves upward.
One big anchor plus supporting frames

Let one large family photo lead, then add smaller tiles around it. This is best when you want one standout portrait supported by candid moments.
How do you keep a gallery wall cohesive (without making it boring)?
Limit your variables to color, frame finishes, and spacing so your photos feel unified, then add a little personality to keep the wall interesting.
Pick a color strategy
Choose all black and white for unity, or commit to a shared palette like warm neutrals. Consistent tones make mixed pictures feel intentional.
Choose a frame plan
Go with matching black frames or white frames for a crisp look. If you want variety, mix two to three finishes like black, white, and wood to stay cohesive.
Balance sizes and orientations
Pair verticals with horizontals and vary scale so the eye travels around the gallery. Place the second largest piece diagonally from the largest to create balance. Not sure what dimensions will feel right? Use our canvas size chart to choose proportions that fit your wall and viewing distance.
Add personality with mementos
Blend in a ticket stub, a tiny Polaroid, or a child’s drawing. Float mounting small keepsakes adds depth and art gallery vibes to your wall decor.
How do you plan and hang without making a dozen holes?
Map the layout on the floor, mark your spacing, then use Mixtiles to test and tweak on the wall. The adhesive or magnet system lets you adjust until the wall looks just right.
Map it on the floor first
Tape out your wall’s footprint on the floor, arrange frames inside the outline, then snap a reference photo. This helps you see composition and spacing before you touch the wall.
Nail-free test and tweak
Stick Mixtiles up lightly to test. Shift tiles left or right for perfect gaps. The stick and restick technology keeps walls clean and makes diy gallery building simple.
Spacing and height rules that work
Keep 2–3 inches between frames for a cohesive grid or organic gallery. Center the display at about 57–60 inches from the floor. On textured walls or brick, press firmly for a few seconds to help the adhesive grip.
Quick hanging checklist
|
Step |
Details |
|---|---|
|
Measure and plan |
Measure wall width and decide your target footprint. Sketch or tape the outline on the floor for a trial layout. |
|
Place anchors first |
Position the largest tile, then the second largest diagonally for balance. Fill in around them with smaller photos. |
|
Mind orientation |
Mix vertical and horizontal images. Keep gaps consistent at 2–3 inches for a tidy, cohesive look. |
|
Prep and mount |
Wipe the wall dry and dust-free. Stick and straighten each tile. Adjust by lifting and re-placing until everything aligns. |
Care and safety: Mixtiles are lightweight, so they are safe on most painted walls, wallpaper, wood paneling, and even many brick or cement surfaces. Clean with a dry, soft cloth only.
Find your perfect layout in seconds. Explore our designer-curated gallery walls for instant inspiration, or create your own custom grid with our popular 8x8 canvas prints to get a flawless look.
Which family photos should you choose for a meaningful display?
Lead with photos that spark emotion, then edit for consistency so the whole wall reads as one story.
- Prioritize candid moments over stiff poses: pick laughter, movement, and everyday life. These images make your home feel warm, fun, and real;
- Try themed stories (wedding, milestones, travels): group a wedding sequence from your wedding photo book in black and white, or display baby’s first-year milestones in a tidy grid. Travel photos add energy to a family picture wall in a hallway or family room;
- Edit for consistency: apply the same filter or keep similar tones across pictures. A shared look helps mixed images feel put together;
- Crop with intention: crop in to highlight faces and key details. Make sure the subject is clear at the print size. Mixtiles offers custom canvas prints for bold portraits when you want one standout piece.
How can you refresh your gallery wall over time?
Treat your photo wall like living decor: update it with new pictures, swap in seasonal images, and grow the display as your family grows.
Seasonal swaps and mini updates
Rotate a few tiles for holidays or school portraits so the wall always feels current. Save removed tiles with wax paper over the adhesive for storage.
Add tiles as your story grows
Extend a grid by a row, or expand an organic layout outward. Mixtiles stick cleanly so you can add without re-hanging the whole gallery.
Rotate prints for special events
Celebrate birthdays, graduations, and new trips by featuring fresh images. Consider a wall sign with your family name to complete the display.
Creating a gallery wall family photos display is simple when you start with the right spot, choose a layout that fits the wall, and keep a cohesive visual language. Plan on the floor, then use Mixtiles to test spacing and hang without holes. With adhesive, repositionable frames and curated Gallery Wall Kits, you can design, refine, and refresh your wall art whenever inspiration strikes.
Transform your photos into stunning wall arts. From stickable frames to high-quality canvas prints, we make it easy to bring your favorite moments to life. Order today and get them delivered to your door.
Frequently Asked Questions
How do I make a gallery wall with family photos?
Pick a high-traffic wall, measure the space, and choose a layout (grid, organic, ledge). Keep a cohesive palette, plan on the floor, and maintain 2–3 inches between frames at eye level. Use Mixtiles to stick, swap, and straighten without nails.
Are gallery walls still in style for 2025?
Absolutely. 2025 favors clean grids, tonal palettes, and personal, evolving displays that mix photos with small art. Flexibility is key: nail-free options like Mixtiles make it easy to refresh seasonally and expand as your family’s story grows.
What is the 2/3 rule for hanging pictures?
The 2/3 rule suggests your artwork or gallery wall should span about two-thirds the width of the furniture below it. For a 90-inch sofa, aim for roughly 60 inches total width. Center the display around 57–60 inches from the floor.
How can I display family photos without looking cluttered or tacky?
Limit variables: pick a consistent color treatment, use matching frames or two to three finishes, and keep 2–3 inch gaps. Mix candid moments with a few statement shots, align centerlines, and edit ruthlessly. Mixtiles provide clean edges and easy reordering for a polished look.
Be the first to know — deals, news & decor ideas.
By clicking you agree to the Terms of Use & Privacy Policy